

At-Home Microneedling for Beginners: A Safe Step-by-Step Guide (2026)
Did you know that at-home microneedling for beginners can increase your skin's transdermal serum absorption by up to 80%? This professional-grade ritual is a powerful way to achieve a glowing, rejuvenated complexion without the high cost of office visits. By following a meticulous sanitization process and choosing the right needle depth, you can safely transform your skin texture from your own home.
It's natural to feel overwhelmed by device options or worried about potential skin damage. You want a smoother, clearer complexion, but the fear of doing it wrong can be a major hurdle. We're here to replace that hesitation with confidence by showing you exactly how to perform this treatment like a pro.
This guide covers everything from selecting the safest stamp-style devices to the precise steps for a sterile treatment. You'll discover how to choose the right needle depths, which nourishing serums to use, and the essential aftercare steps to ensure your skin stays healthy and radiant.
Key Takeaways
- Understand why adjustable electric pens are the preferred choice over traditional rollers for achieving professional results safely.
- Master the essential sanitization and preparation protocols that make at-home microneedling for beginners a secure, effective ritual.
- Discover how to utilize the "golden hour" after your session by applying Salmon DNA (PDRN) ampoules for maximum skin vitality.
- Follow a clear step-by-step guide on using slip serums and correct technique to avoid skin dragging.
- Learn the non-negotiable post-treatment rules for device sterilization and the importance of SPF 30+ during your skin's recovery.
What is At-Home Microneedling and How Does it Work?
At-home microneedling for beginners is a minimally invasive technique that uses tiny needles to create microscopic channels in the skin. These micro-channels are the secret to unlocking a more vibrant, healthy-looking complexion. In 2026, the rise of "smart" skincare devices with adjustable speeds and precise depths has made this professional-grade ritual accessible for your weekly self-care routine. While a clinic session often involves deeper penetration for specific skin concerns, your at-home routine focuses on cosmetic rejuvenation and maximizing the power of your favorite serums.
The main "why" behind this practice is two-fold. First, it boosts your skin's natural ability to look firm and plump. Second, it dramatically enhances how well your products work. Traditionally, your skin acts as a tough barrier, but microneedling creates temporary pathways that allow active ingredients to sink in deeper than they ever could with just a manual application. This shift toward "active" skincare is why 2026 is the year many are moving away from basic rollers and toward sophisticated, adjustable electric pens.
The Science of Micro-Channels
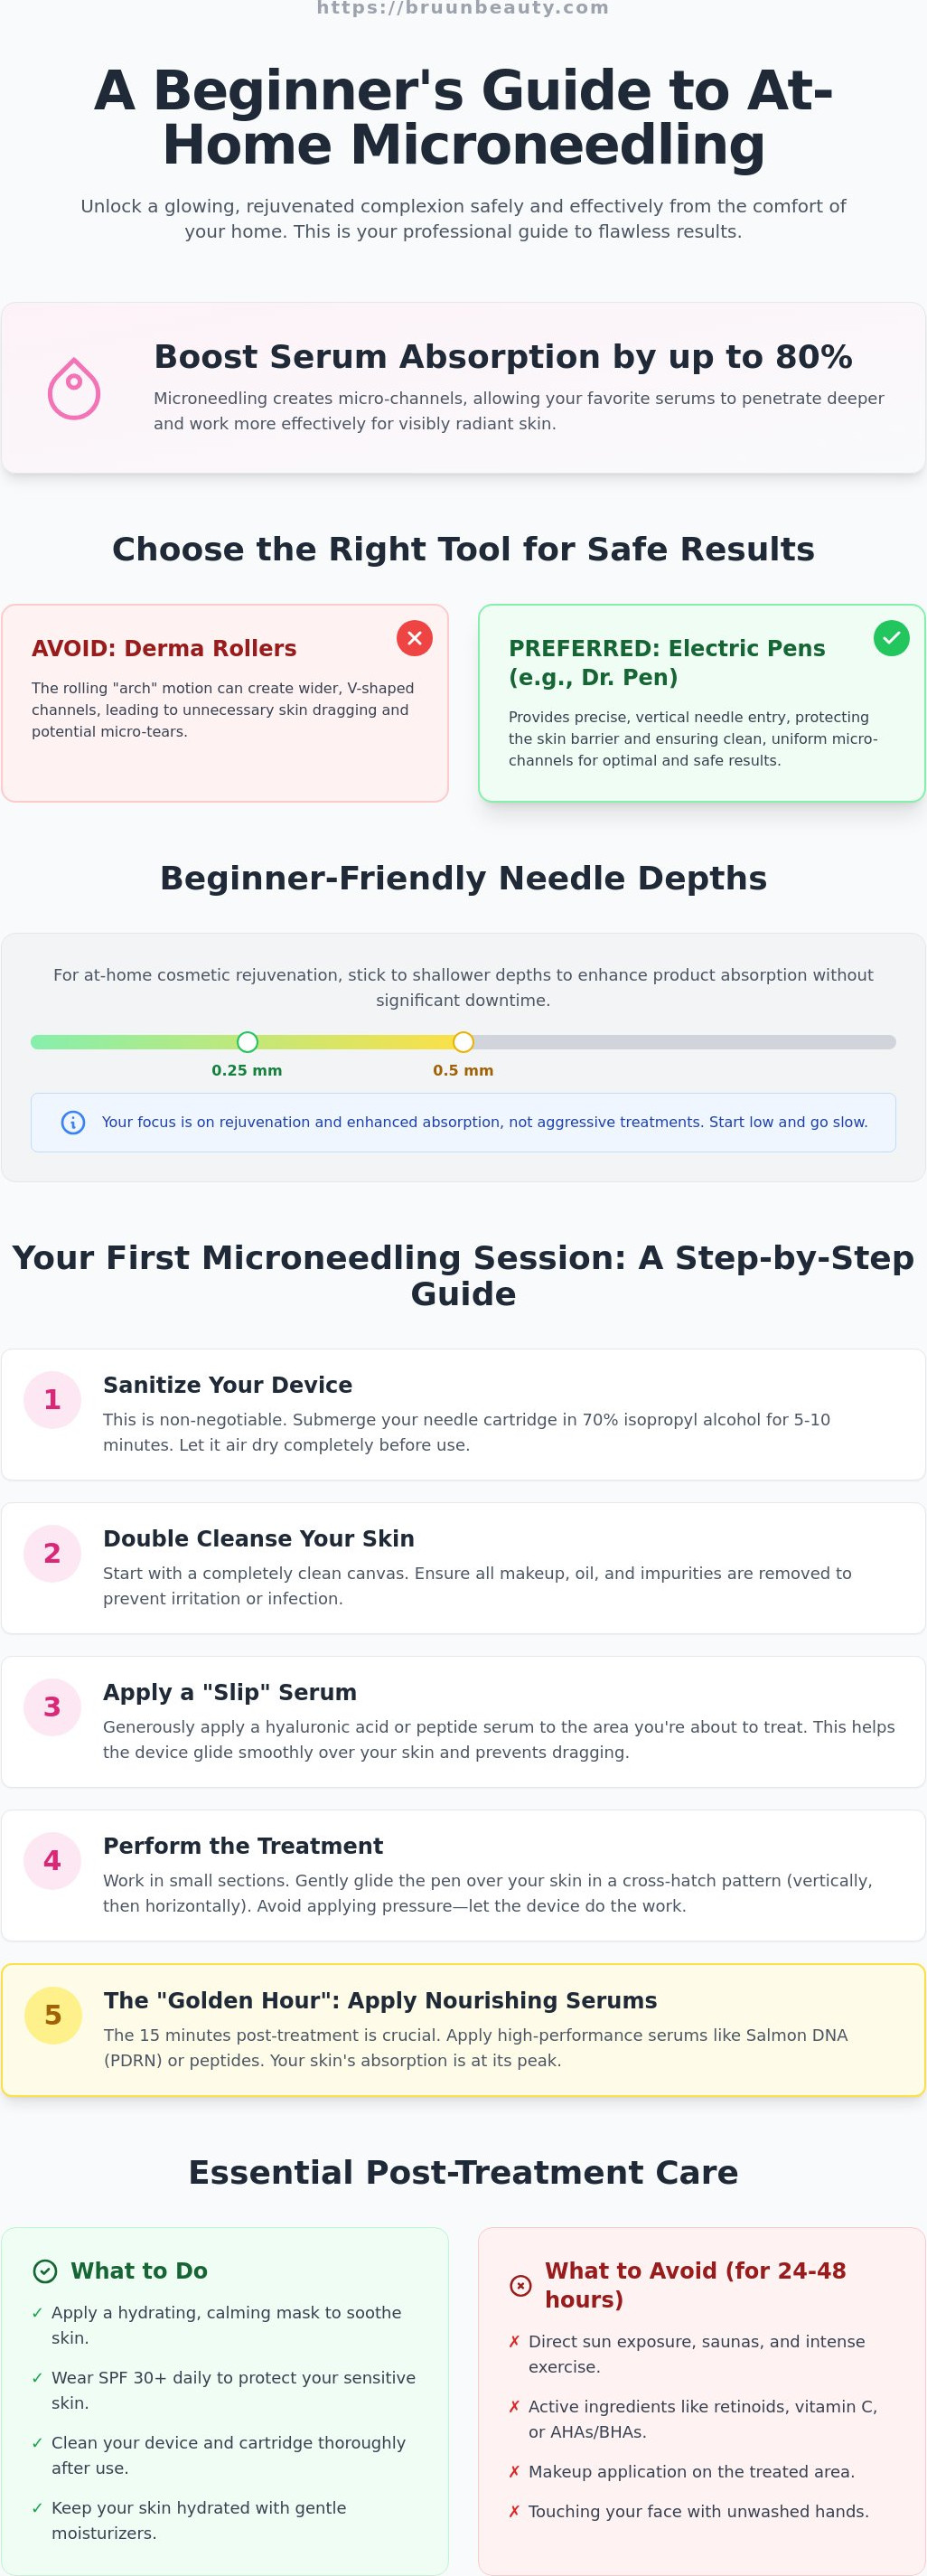
When you glide a device across your face, you're performing Collagen induction therapy (CIT). These controlled micro-injuries act as a wake-up call for your skin's natural repair response. This process triggers the release of growth factors, which are essential for achieving a youthful, nourished glow. At home, you'll typically work with shallower depths, often between 0.25 mm and 0.5 mm. These depths are perfect for rejuvenation without the downtime associated with medical-grade procedures. It's about giving your skin a gentle nudge to renew itself more efficiently.
Immediate vs. Long-Term Benefits
One of the most exciting parts of microneedling is the "instant plump" you see right after a session. Because the needles create open pathways, your skin's transdermal absorption can increase by up to 80%. This makes the 15-minute window after your treatment the "golden hour" for applying high-performance microneedling serums, such as peptides or Salmon DNA. You'll notice your skin looks more hydrated and luminous almost immediately.
The long-term results are even more rewarding. With regular sessions, you'll see a visible improvement in skin texture and a more even skin tone. Consistency always beats intensity for beginner results. You don't need aggressive needles to see a transformation. Instead, a steady, gentle approach supports your skin barrier and leads to lasting, professional-level radiance from the comfort of your home.
- Instant Glow: Enhanced product penetration for immediate radiance.
- Texture Refinement: Smoother skin through consistent collagen support.
- Better Absorption: Up to 80% increase in serum effectiveness.
- Safe Depth: Beginner-friendly focus on 0.25 mm to 0.5 mm needle lengths.
Essential Tools: Choosing Your First Microneedling Device
Selecting your equipment is the most important step for a safe and effective experience. While manual derma rollers were once the only option, at-home microneedling for beginners has shifted toward precision electric pens. These devices provide a vertical entry that protects your skin barrier, unlike the "arch" motion of a roller which can cause unnecessary dragging or micro-tears. High-speed motors allow the needles to move in and out of the skin so quickly that the process is much more comfortable than older manual methods.
When you are choosing a device, look for adjustable depth settings and high-quality motors. Leading options like Dr. Pen devices have become the gold standard for home users because they offer the same precision found in professional clinics. You should also check the regulatory status of your tools. The FDA-authorized microneedling devices page provides excellent context on how these tools are monitored for consumer safety. Using a device with a stable motor ensures that every micro-channel is clean and precise, which is essential for a healthy glow.
Understanding Needle Counts
The number of needles in your cartridge changes how the treatment feels and what it achieves. You'll find several options in our collection of needle cartridges, and each has a specific purpose:
- 12-16 needles: These are best for targeted work on specific texture concerns. Because the needles are slightly more spaced out, they provide excellent precision for smaller areas like the sides of the nose.
- 36-42 needles: These are perfect for general rejuvenation. They are often perceived as more comfortable because the needle density creates a more even distribution of pressure across the skin.
- Nano-needles: These are the ultimate "safety first" choice. They don't technically puncture the skin deeply, making them ideal for increasing product absorption without any downtime or discomfort.
Needle Depth Safety Guide
Safety is your number one priority when performing this ritual yourself. For a successful session, keep your needle depths between 0.25 mm and 0.5 mm. You should never exceed 0.5 mm at home. Depths beyond this range are considered medical-grade and require a licensed professional to manage the potential risks. Your skin isn't the same thickness everywhere, so you must adjust your pen as you move across different zones.
On the forehead and around the eyes, where the skin is thin, stay at 0.25 mm. For the fleshier parts of your cheeks or chin, you can safely move up to 0.5 mm. Always start with the lowest setting to see how your skin responds before increasing the depth. If you are ready to upgrade your routine with professional-grade gear, you can browse our full microneedling collection to find the right fit for your unique skin goals.
Step-by-Step: Your First At-Home Microneedling Session
Performing your first session of at-home microneedling for beginners is an exciting milestone in your skincare journey. To start, you must double cleanse your face to remove every trace of makeup, oil, and SPF. Once your skin is clean, pat it dry with a fresh paper towel. Your skin needs to be completely dry before you begin the process. Next, apply a high-quality "slip" serum to the first area you plan to work on. This serum acts as a lubricant, preventing the device from dragging or scratching your skin as it glides across the surface.
The core of the treatment involves a specific cross-hatch technique. You will move the pen in horizontal, vertical, and diagonal passes over each section of your face. This ensures even coverage and maximizes the creation of micro-channels. After you finish, your skin will likely show some "pinkness" similar to a mild sunburn. This is a normal response. Simply apply a soothing serum and avoid touching your face with unwashed hands for the rest of the day.
Preparation and Sanitization
Setting up a sterile workspace is how you achieve professional results at home. Clear a dedicated area and wipe it down with a disinfectant. Even if your device is brand new, you should wipe the exterior with 70% isopropyl alcohol. It is also vital to follow FDA guidance on microneedling safety to ensure you are minimizing any risk of irritation. Always practice the "no-touch" rule: open your sterile needle cartridges carefully and click them into the pen without touching the needles themselves.
Mastering the Glide Technique
To get the best results, hold your pen at a strict 90-degree angle to your skin. This vertical entry is the reason electric pens are safer than rollers; they enter and exit the skin cleanly without causing unnecessary trauma. Divide your face into four quadrants: the forehead, the left cheek, the right cheek, and the chin and nose area. Focus on one quadrant at a time to stay organized.
Use a light, steady hand. You don't need to press the device into your skin; let the high-speed motor do the work for you. Gently glide the pen across the skin in short, controlled strokes. If the pen feels like it is "sticking," apply more slip serum immediately. This disciplined approach to your at-home microneedling for beginners session ensures your skin remains protected while you encourage a more rejuvenated, glowing complexion.
Advanced Pairings: Serums and Masks for Maximum Glow
The 15 minutes immediately following your session are known as the "golden hour" for your skin. Because you've just created thousands of micro-channels, your skin's ability to absorb active ingredients is at its absolute peak. This is the most effective time to apply high-performance products. Choosing the right formula during this window determines how quickly you see that coveted, professional-grade radiance. When practicing at-home microneedling for beginners, what you put on your skin is just as important as the device you use.
While your skin is in this highly receptive state, you must also be cautious. Some common skincare staples can be too aggressive for freshly needled skin. To protect your barrier and ensure a comfortable recovery, avoid these ingredients for at least 48 hours:
- Vitamin C: Can cause intense stinging and irritation on open micro-channels.
- Retinol and Retinoids: Too powerful for the immediate post-needling phase.
- AHAs and BHAs: Chemical exfoliants should be paused to let the skin focus on repair.
The Power of PDRN and Peptides
For those looking to elevate their results, Salmon DNA (PDRN) ampoules are a top professional recommendation. PDRN is celebrated in K-beauty for its remarkable ability to support skin refreshing and vitality. It works alongside peptides, which serve as the essential building blocks for your skin's natural repair process. These ingredients nourish the skin deeply while it is most open, helping you achieve a plump and vitalized look more efficiently. Selecting high-quality microneedling serums ensures that every micro-channel is filled with nutrients rather than fillers or fragrances.
The Soothing Finish
After you've applied your active serums, a professional jelly mask is the perfect way to seal everything in. These masks are a "secret weapon" for estheticians because they create a vacuum-like seal over the face. This seal helps force-feed the nutrients from your serums into the skin while providing an immediate, deep cooling sensation. It's an essential step for reducing the temporary pinkness and heat that often follows a session of at-home microneedling for beginners.
Mixing and applying a jelly mask also adds a luxurious, spa-like feel to your routine. You mix the powder with purified water until it reaches a thick, paste-like consistency, then spread it over your skin. As it solidifies into a flexible, rubbery layer, it provides a psychological reset that signals the end of your treatment. This cooling ritual calms both your skin and your mind, leaving you with a nourished and glowing complexion. To find the perfect pairing for your skin type, explore our full microneedling collection today.
Post-Care, Cleaning, and Safety Protocols
Your journey with at-home microneedling for beginners doesn't end when the device is switched off. The success of your treatment depends heavily on how you handle the recovery phase. Since your skin barrier is temporarily open, you must be diligent about hygiene and protection. This phase is about supporting your skin's natural renewal process while keeping it safe from environmental stressors.
Sun protection is non-negotiable. For at least 24 to 48 hours after your session, your skin is highly sensitive to UV rays. You must apply a broad-spectrum SPF 30+ every morning, even if you stay indoors. Exposure to the sun without protection can lead to unwanted pigmentation or irritation. Think of your skin as a "new" surface that needs a shield while it settles into its refreshed state.
One of the most common mistakes is trying to needle too often. For beginners, the "Wait Rule" is your best friend. You should schedule your sessions once every 4 to 6 weeks. This timeline gives your skin enough time to produce collagen and fully recover before the next treatment. Patience is the key to seeing long-term improvements in texture and tone without causing stress to your complexion.
Sanitization and Maintenance
Maintaining your skincare devices is critical for safety. After every use, remove the cartridge and dispose of it immediately. These are strictly one-time use; reusing them can lead to infection or skin damage because the needles become dull and contaminated. To clean the pen itself, perform a 5-minute soak of the pen's head in 70% isopropyl alcohol, ensuring no liquid enters the motor. Store your device in a clean, dust-free case between sessions.
When it's time to dispose of your needles, use a puncture-proof container, like a sharps bin, to keep yourself and others safe. Most electric pens are built to last, but you should inspect yours regularly for any signs of motor wear. If the device starts to sound different or the needle depth feels inconsistent, it's time for a replacement to ensure your sessions remain precise and effective.
Timeline for Results
In the first 24 hours, expect your skin to feel tight and look slightly red, similar to a mild sunburn. This is a sign that the repair process has begun. By Day 3, most of the pinkness will fade, and you'll begin to see the "Day 3 Glow." This is when your skin starts to look smoother and more vibrant as the micro-channels close and the serums you applied during the "golden hour" do their work.
Real results take time to build. While the initial plumpness is exciting, the structural improvements in skin texture happen over several months. Stick to your 4-to-6 week schedule, and you'll notice cumulative benefits that lead to a consistently nourished and glowing complexion. This disciplined approach to at-home microneedling for beginners ensures you achieve professional-level results with total confidence.
Your Path to Professional-Grade Radiance
Mastering at-home microneedling for beginners is about more than just owning a device; it's about a disciplined ritual that prioritizes safety and high-performance ingredients. By selecting a professional-grade Dr. Pen device and following a strict sanitization protocol, you've already taken the most important steps toward a more rejuvenated complexion. Remember to always respect the "golden hour" for serum absorption and give your skin the 4-to-6 week recovery window it needs to truly shine.
We're here to support your goals with inventory that ships directly from our hubs in Miami and Los Angeles. Our collection features 5-star rated K-beauty serums and genuine Dr. Pen technology used by professionals across the country. You don't have to wait for an office appointment to see a visible transformation in your skin's texture and tone.
Ready to start your journey? Shop our curated Microneedling Collection and get professional results at home. We're excited to help you achieve the clear, nourished, and glowing skin you deserve.
Frequently Asked Questions
Does at-home microneedling hurt for beginners?
Most users describe the sensation as light scratching or a prickly vibration. It's not usually painful, especially when you use a high-speed electric pen that moves the needles quickly. If you feel significant pain, you're likely pressing too hard or using a needle depth that's too deep for that specific area. Always let the device do the work for you.
How often should I microneedle my face at home?
For at-home microneedling for beginners, the sweet spot is once every 4 to 6 weeks. Your skin requires this time to go through its full renewal process and build new collagen. Needling too frequently doesn't speed up results; it actually stresses your skin barrier and can lead to prolonged inflammation. Consistency over time is much more effective than aggressive, frequent sessions.
Can I use microneedling on active acne or breakouts?
You should never needle directly over active acne, pustules, or inflamed breakouts. This can spread bacteria across your face and potentially lead to more breakouts or irritation. It's perfectly fine to needle the clear areas of your skin while avoiding the active spots. Wait until your skin is clear and calm before treating those specific areas to ensure a safe and successful session.
What is the best needle depth for a first-time user?
The safest depth for your first few sessions is 0.25 mm. This depth is excellent for increasing product absorption and improving skin glow without over-stressing the tissue. As you gain confidence with at-home microneedling for beginners, you can increase the depth to 0.5 mm on the cheeks. However, you should never go deeper than 0.5 mm at home, as that requires professional supervision.
When can I apply makeup after a microneedling session?
You should wait at least 24 hours before applying any makeup to your skin. Your micro-channels remain open for several hours after a session, making your skin a sponge for whatever you apply. Makeup products often contain fragrances or minerals that can clog these channels or cause irritation. Stick to a clean, simple hydration routine for the first day to keep your complexion happy.
What should I do if my skin stays red for more than 48 hours?
If your skin remains red after 48 hours, focus on soothing, fragrance-free hydration. Use products with ceramides or centella asiatica to support your barrier. This prolonged redness is often a sign that the needle depth was a bit too aggressive or the skin was sensitive. Avoid all active ingredients like acids or retinols until the redness completely disappears and your skin feels comfortable again.
Can I share my microneedling device with a friend if I change the needle?
No, you should never share your device with anyone else. Even if you use a fresh needle cartridge, microscopic skin cells or fluids can travel into the device head. This creates a high risk of cross-contamination and infection. To keep your skin healthy and safe, your microneedling pen should be a personal tool that only you use, following strict sanitization protocols every time.
Which serums are safest to use during the actual needling process?
The safest choice is a high-quality, pure Hyaluronic Acid or a specialized microneedling serum. These provide the "slip" your device needs to glide smoothly without dragging. Avoid any serums with Vitamin C, acids, or heavy fragrances during the actual needling process. You want ingredients that are simple, hydrating, and designed to be compatible with the micro-channels you're creating in the skin.
Dr. Pen Aftercare Guide: Healing Tips for Glowing Skin
Microdermabrasion vs Microneedling for Scars: Which Should You Choose
Related Posts

Consistent Microneedling and the Long-Term Changes to Expect

Aftercare choices to lower infection risk at home after microneedling

How to Create a Relaxing At-Home Spa Day With Simple Rituals

Sunscreen Recommendations After Microneedling: How to Protect Healing Skin

Investing in my skin for the future: what deserves my budget

Post-microneedling skincare routine for masks, makeup, and recovery

Skin Peeling After Microneedling: What to Avoid and When to Resume Makeup
