

Choosing an At-Home Microneedling Pen for Beginners
The best microneedling pen for beginners is often the simplest one, not the model with the most features. Look for a device intended for at-home use, with clear setup instructions and cartridges identified as compatible. Learn how the pen works before adding it to your routine.
It’s natural to wonder how a pen-based treatment differs from professional microneedling. Both use a pen with fine needles, but at-home and in-office treatments can differ in depth and approach. A device designed for home use is not a substitute for professional treatment.
This guide explains how microneedling works and what to consider when choosing a beginner-friendly pen, including its design and cartridge compatibility. You’ll also learn how at-home treatment differs from in-office care and how to keep your skincare routine gentle afterward. These points can help you make a more informed choice before you begin.
Key Takeaways
- Choose a pen designed for at-home use, with clear controls and cartridges made to fit the device.
- Understand how at-home and in-office treatment approaches differ before deciding which option suits your goals.
- Compare features that affect ease of use, such as the pen’s setup and cartridge options, rather than choosing by appearance alone.
- Plan a gentle aftercare routine to help keep your skin comfortable as it settles after treatment.
- Learn how microneedling serums and other skincare products can fit into your routine.
At-home microneedling device recommendations
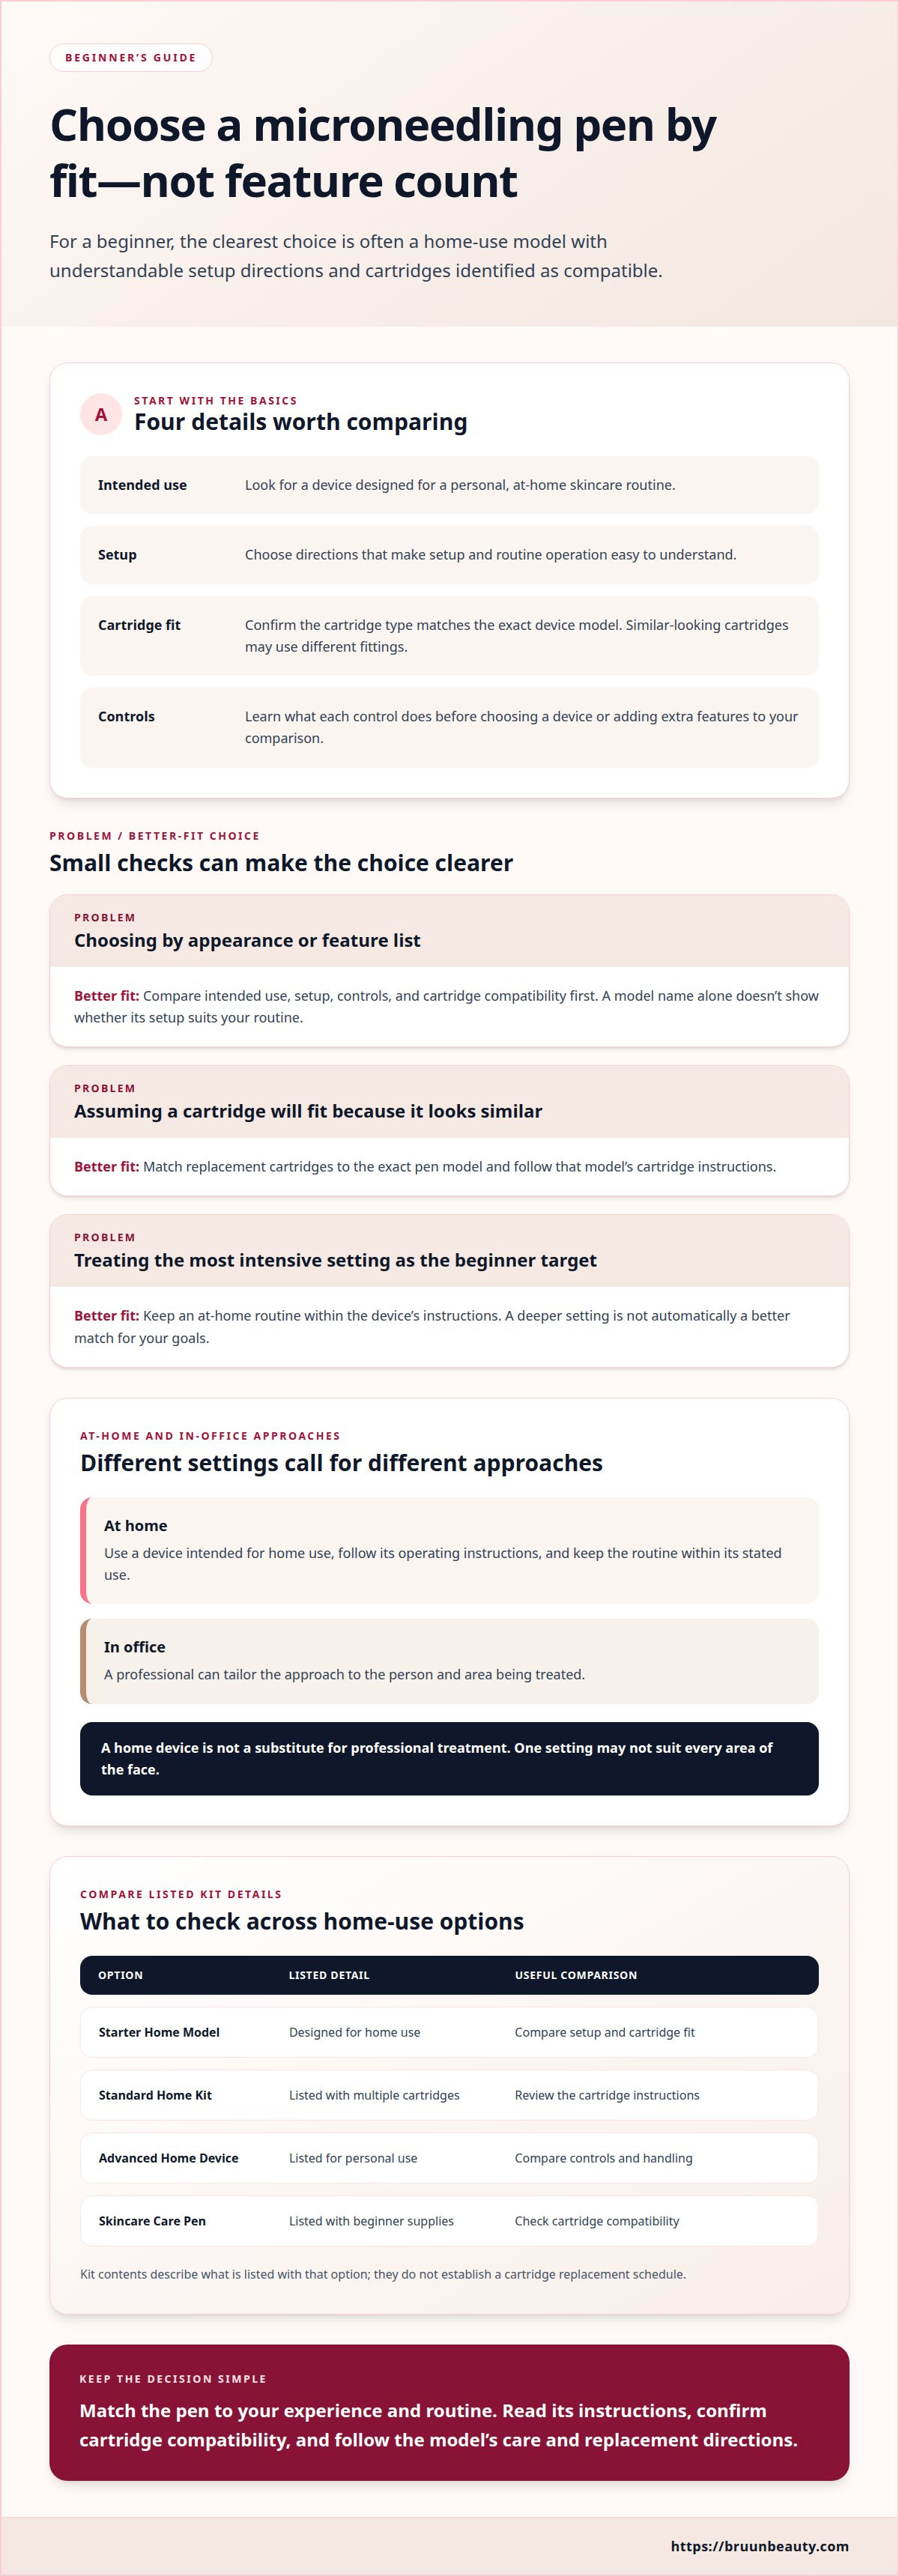
The best microneedling pen for beginners is a home-use model with clear instructions and compatible cartridges. Compare specific models designed for personal skincare routines, focusing on ease of use and safety features. A model name alone won’t tell you whether its controls or setup suit your routine.
Start by matching the device to your experience. Look for simple setup directions and clear cartridge information before weighing extra features. If you already understand pen-based skincare tools, compare additional options based on whether they fit your routine. The Bruun Beauty microneedling device range offers a way to compare options by category.
| Option | Listed detail | Useful comparison point |
|---|---|---|
| Starter Home Model | Designed for home use | Compare setup and cartridge fit |
| Standard Home Kit | Listed with multiple cartridges | Review cartridge instructions |
| Advanced Home Device | Listed for personal use | Compare controls and handling |
| Skincare Care Pen | Listed with beginner supplies | Check cartridge compatibility |
Choose a pen whose intended use, instructions, and cartridge system fit your experience and routine.
Before buying, match the exact model to its cartridge type. Similar-looking cartridges may have different fittings, so the number included in a kit doesn’t establish compatibility. Keep the operating instructions nearby and learn the controls before your first session. A straightforward setup matters more than features you won’t use.
How do you clean and maintain a microneedling pen, and when should cartridges be replaced? Follow the care and replacement directions for your exact model, since both depend on its design. The kit's included cartridges describe listed kit contents, not a replacement schedule.
- Clean and store the pen according to its instructions.
- Match each replacement cartridge to the exact device model.
- Follow the manufacturer’s guidance for cartridge replacement.
To choose the best microneedling pen for beginners, compare intended use, instructions, and cartridge compatibility first. Assess available devices by their listed use and kit details, then maintain according to the selected model’s directions.
At-home versus in-office treatment depth
At-home microneedling uses a more conservative approach than in-office treatment. The difference matters because needle depth affects how the pen interacts with your skin. A home routine should stay within the device’s intended use, while a professional can tailor treatment to the person and area being treated.
For example, cheeks and foreheads differ in surface area and contours. A professional can adjust technique while treating those areas. At home, follow the pen’s instructions and don’t treat its most intensive setting as a beginner target. Greater depth doesn’t automatically make a treatment a better match for your skincare goals.
- At home: Stay within the device’s home-use instructions.
- In office: A professional selects an approach based on the area.
- For beginners: Don’t assume the deepest available setting suits your routine.
Depth is only one part of the treatment. The area, the pen’s instructions, your comfort, and your experience all shape a sensible approach. Using one setting across the entire face, for instance, overlooks differences between the forehead and cheek. Follow device guidance instead of pursuing a stronger sensation.
Match the setting to the treatment itself. At-home tools are designed for a restrained routine, while professional treatment allows an individualized approach. When comparing options, check whether the device is intended for home use and read its operating instructions before choosing settings. Keep professional treatment distinct from an at-home routine, especially if you’re considering a more intensive approach.
That distinction can help keep depth in perspective when comparing a home routine with professional care. The article describes about 0.3 mm as the safe at-home microneedling depth. Treat this as a conservative reference, not a reason to override the instructions for a particular pen or apply one setting everywhere. The area being treated, your comfort, and your experience remain relevant to the choice. A stronger sensation or a deeper setting is not automatically a better match for your goals.
The article warns that at-home microneedling deeper than .75 mm is generally not recommended without strict guidance from a dermatologist or facial plastic surgeon. That caution marks a clear boundary between routine home use and a more intensive approach. By comparison, professional microneedling can reach a depth of about 2.5 mm, depending on the area. The difference is not simply a matter of choosing the largest available setting: the treatment area and an individualized professional approach matter too. If a setting would take an at-home routine beyond its intended use, don’t treat it as a substitute for professional care. Keep the device’s directions central, and seek strict guidance before considering greater depth.
Choosing a microneedling pen
Compare a beginner pen by its intended use, operating instructions, controls, and replacement options. A pen being sold for home use doesn’t, by itself, establish its FDA clearance or regulatory status. Don’t infer either from its name or marketing.
Choosing a Beginner Microneedling Pen
A beginner-friendly design makes routine operation easy to understand. Read the setup steps and learn what each control does before deciding which model suits you. Check whether the instructions explain how to pause, adjust settings, and store the device. A clear manual helps you follow the manufacturer’s intended use instead of relying on guesswork during a session.
Also consider how the pen feels to handle. A steady grip can make it easier to guide the device across small facial areas. If possible, compare the shape and control layout shown in product images. Extra modes matter less than a design you can operate comfortably and consistently.
Compatible Cartridges and Needle Types
Look beyond a cartridge’s appearance when comparing pens. Clear product labels and replacement information make it easier to identify the correct cartridge later. Check whether a listing names both the device model and cartridge type, rather than relying on a broad label such as “universal.” Consistent naming across the manual and packaging can simplify replacement decisions.
Kit contents can affect convenience. One starter kit may include cartridges, while another may require you to source them separately. Treat the included quantity as a supply detail, not proof that every cartridge type fits. Keep the packaging or product instructions as a reference when planning replacements.
For FDA status, don’t assume every at-home microneedling pen has the same clearance or regulatory classification. Marketing descriptions and home-use labels alone don’t answer that question. Consider the device’s stated intended use and product labeling alongside practical factors such as controls and replacement supplies.
Use this quick comparison before choosing:
- Readability: Can you follow the setup and operating directions?
- Handling: Do the grip and controls seem manageable?
- Supplies: Are replacement cartridges clearly identified?
- Device details: Does the product information explain its intended use?
A suitable choice is one you can operate as directed and maintain with clearly identified supplies. Prioritize understandable instructions and a usable design over a long feature list.
How to Use a Microneedling Pen at Home: A Step-by-Step Guide
A steady routine starts with the device instructions, a compatible cartridge, and a gentle aftercare plan. Follow the steps in order, keeping the manufacturer’s directions beside you.
- Prepare your space. Choose a clean, well-lit area and set out the pen, its instructions, and the compatible cartridge. Read the model’s setup directions before assembling anything.
- Prepare your skin. Cleanse your face gently and let it dry. Avoid starting over makeup, sunscreen, or skincare residue, which can interfere with a clean, even application.
- Set up the pen. Attach the cartridge specified for your exact model. Select settings only as directed in the device instructions. Don’t choose a setting just because it is available.
- Work in sections. Divide your face into manageable areas, such as the forehead, cheeks, and chin. Move the pen steadily, following the manufacturer’s technique guidance for each area. Avoid repeatedly working over the same spot.
- Finish and store. Follow the device’s directions for removing the cartridge, cleaning the pen, and storing it. Keep its compatible cartridge information with the device for your next session.
For skincare afterward, keep the routine simple. Avoid active exfoliating ingredients, including AHAs and BHAs, for at least two days after treatment. Wait 72 hours before returning to your usual routine, and do so only if redness, tenderness, and sensitivity have subsided.
During the first day or two, redness and flaking may occur after microneedling. Keep your routine gentle during this period, and don’t rush to layer your usual active products. A full skin-healing cycle takes 4-6 weeks, so plan your routine with recovery time in mind.
Consistency means following the same clear sequence, not increasing settings or repeating passes. Keep the device manual accessible, match each cartridge to the pen, and use the aftercare timeline as your guide. If your skin still feels sensitive at 72 hours, continue with gentle care until those signs have subsided.
What cartridges or needle types are compatible with beginner microneedling pens?
Cartridge labels can describe more than fit. They may identify a needle configuration or intended application, so read the product wording carefully before choosing. For beginners, a clearly described option is easier to understand than one chosen only because its name sounds familiar.
Start with the cartridge description, then compare its terms with those in the pen’s operating guide. Look for a plain explanation of the cartridge type and intended use. If a listing uses abbreviations, don’t guess what they mean. A clear product description helps you understand your choice before setting up the device.
Needle configurations are not interchangeable. A cartridge type may be intended for a different application than another, even when both are presented for the same pen category. Choose according to the purpose stated in the product information, not on the assumption that a larger assortment offers more flexibility.
- Read the description: Identify the cartridge type and its stated purpose.
- Interpret labels: Use the product wording instead of guessing at abbreviations.
- Keep it simple: Choose an option with directions you can follow.
- Follow device guidance: Use cartridge instructions alongside the pen’s manual.
For a beginner, a small, clearly labeled selection can be easier to manage than several unfamiliar styles. The cartridge count tells you how many pieces a kit contains; the type description tells you what kind of cartridge it is. Keep those details separate when comparing kits, and don’t treat quantity as a measure of suitability.
Replacement supplies are easier to plan when you keep the cartridge packaging or product description for reference. Note the name of the type you selected so your next purchase is based on the same designation. This simple record helps avoid confusion between similar labels and keeps your routine consistent.
Explore microneedling pen cartridges by comparing their descriptions and stated uses. Use the information for the cartridge itself, not just the general category name. If the product details describe a particular application, follow that wording and the device’s directions when choosing supplies.
In short, focus on clear descriptions, intended use, and manageable choices. These details help you understand each cartridge’s purpose without making assumptions based on its appearance or label.
Bruun Beauty
Bruun Beauty gives at-home skincare enthusiasts and estheticians access to microneedling-related products and supplies. After comparing pens, settings, and compatible cartridges, consider how the rest of your skincare routine fits your plans. Choose products that suit the routine you intend to follow.
For example, the Advanced Microneedling Serum SD - Control Salmon DNA Ampoule Serum is a skincare option in the microneedling category. Review its product details as you decide which skincare products belong in your routine. Keep your device’s directions central, and don’t assume every product suits every step or treatment approach.
A complete skincare setup can include products beyond a pen and serum. Bruun Beauty offers Jelly Mask Kits and BB Glow Treatment Supplies for professionals and skincare enthusiasts to explore as part of a broader beauty routine. These products serve different purposes, so choose according to the routine or service you’re planning.
- For device research: Compare microneedling options and related supplies.
- For skincare planning: Review the Salmon DNA serum’s product information.
- For additional routines: Consider Jelly Mask Kits or BB Glow Treatment Supplies where relevant.
Keep your choices practical. Start with the pen and cartridge compatibility details you’ve reviewed, then consider which skincare products fit your routine. Read product descriptions to understand each item’s intended use instead of choosing based on a trend or broad product label.
Bruun Beauty is a natural next step if you’re ready to explore products related to microneedling and at-home skincare. Licensed estheticians can browse supplies for professional beauty routines. Choose products that fit your goals, whether you’re building a simple home setup or considering options for a broader skincare menu.
Take your time comparing product details and matching each choice to its intended use. A considered selection can help you feel organized as you plan your routine, while clear device instructions remain your guide for using a pen. To explore the relevant range, browse microneedling products with Bruun Beauty.
Frequently Asked Questions
How does microneedling work?
A microneedling pen moves fine needles across the skin in controlled passes, creating tiny channels at the surface. This cosmetic technique is used to support the appearance of smoother, more even-looking skin. The pen’s movement and cartridge type shape how the treatment is performed. At-home devices should be used according to their own instructions, not treated as substitutes for professional equipment.
How long after microneedling do you see results?
There isn’t one timeline that applies to everyone, and a specific result can’t be promised. The skin’s full healing cycle after microneedling takes 4-6 weeks, but that describes the cycle, not a guaranteed date for visible changes. Your routine, treatment approach, and skin’s response all influence what you notice. Compare progress under consistent lighting rather than judging from day to day.
How much does a microneedling pen cost?
Microneedling pen prices vary by model and kit contents, so compare the device, compatible cartridges, and included accessories together. Also consider replacement cartridges, since the initial kit contents don’t tell you the ongoing cost. A simple model with clear instructions may suit a beginner better than one with features they don’t plan to use.
What are the benefits of microneedling?
People choose microneedling as a cosmetic way to work on the look and feel of skin texture. A pen provides a consistent tool for moving across selected areas, while a professional can tailor an in-office approach. The right choice depends on your goals and whether you prefer a home routine or professional treatment. Results vary, so treat it as one skincare option, not a promise.
What are the side effects of microneedling?
Temporary redness or flaking can occur during the first day or two after microneedling. Keep aftercare gentle during this period, and don’t rush back into active products while your skin feels sensitive. If you’re planning a home routine, read the device directions and aftercare guidance before starting. Aim for a comfortable, considered process, not an intense treatment experience.
What if I need help choosing a microneedling pen?
Narrow your options to pens intended for home use, then compare instructions, controls, and cartridge compatibility. Bruun Beauty offers DR. PEN microneedling devices to consider as part of that comparison. Focus on the model’s stated use and product details, rather than assuming similar-looking pens share the same setup or compatible cartridges.
What’s the recovery process like?
Plan a gentle routine after treatment, with cleansing and simple skincare rather than a quick return to every active product. Redness and flaking can happen early, so pay attention to how your skin feels as you resume your usual products. Let your routine settle, and avoid scheduling treatment right before an event where you want your skin to look its best.
What is the best microneedling pen for beginners in the US?
A good beginner choice is a home-use pen with clear operating instructions and cartridges specifically identified for that model. The best fit depends on how straightforward its controls are and whether you can follow its setup and care directions. Compare these practical details first. Don’t choose a device based only on its name, appearance, or number of features.
Microneedling for Shallow and Deep Boxcar Scars
Microneedling for Shallow and Deep Boxcar Scars
Related Posts

Microneedling for Shallow and Deep Boxcar Scars

How to Repair Your Skin Barrier After Microneedling at Home

How to Protect Skin After Microneedling in Summer Heat

How to Care for Oily Skin After Microneedling

Exercise After Microneedling: How Long to Wait Before Working Out

How to Choose Safer Microneedling for Melasma-Prone Skin
